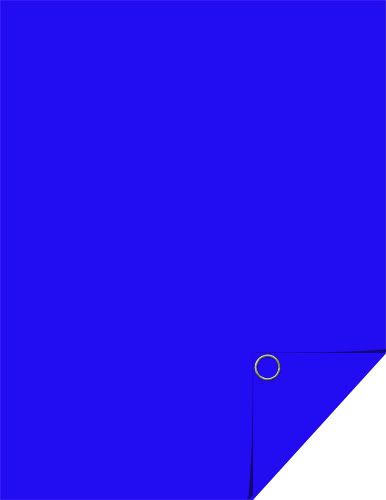
In your document, either drag your paper in or fill with color.

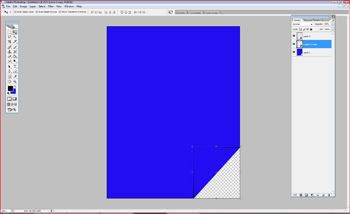
Select the Polygonal Lasso tool. With this tool, draw a triangle shape in the corner of your choice. I have chosen the lower right hand corner.
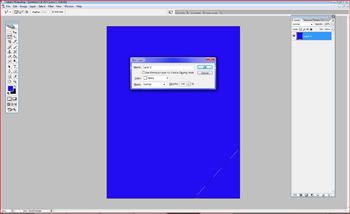
Once you have drawn the triangle, use ctrl+alt+j to create a new layer with the triangle selection on it.
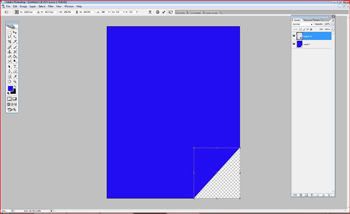
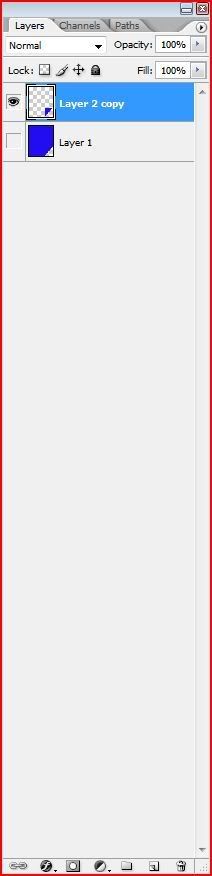
Click on the background layer to highlight it. Then ctrl + click on the triangle layer to select it on the background layer. Then hit delete to delete the shape from the background layer.
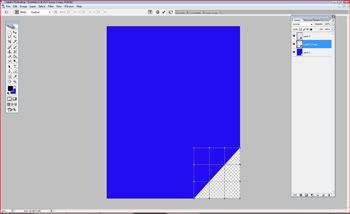
Once you have deleted the triangle shape from the background layer, click on layer 2 to highlight it. Then select the movement tool (or type v). Click the bounding box and type 180 in the degrees turn box. Confirm this rotation by pressing enter or clicking the hand tool.
Duplicate the triangle layer. Drag the copy under the original triangle layer.
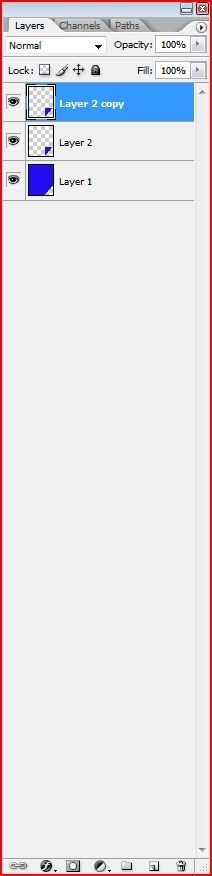
Switch the foreground color to black. Click the gradient/fill tool (or press G) and fill the triangle shape on layer 2 copy with black.


Click the move tool (or press V) then click on the bounding box edge. At the top of the window, 3 icons will appear. Click the bend tool.
This will cause a grid of points to appear on the black triangle layer.
Click the points at the edge of the triangle and pull them slightly outward. This will cause the black triangle to peek out from under the blue triangle. The black (aka the shadow) will show were the corner is folded because the corner will be further away from the background.
Click the check mark by the bend tool to confirm this change.
In the layers palette, select the shadow layer then the opacity slider. Make the opacity around 50% You can play until it looks realistic.
Set the mode to multiply.

Click the eye icon on the background layer to hide it. Then highlight layer 2. Next select Layer>merge visible.
Unhide the background layer by clicking the box where the eye icon was previously.
You can now use the dodge tool to highlight the top corner of the folded corner, making it appear that the paper is catching some glare. Alternately, you can place a brad, eyelet or other fastner to “hold” the corner down.

2 comments:
Wow, you put a lot of work into that! Is this your first tutorial? Are you going to do more? Screen caps are time consuming! I don't have the ability to do the drop shadow like you, so it's fun to see the other program working.
I'm sure this will be useful to some!
Awesome job! Thanks for the warm fuzzies! You did a great job on adding the screen shots, I think those really help people to see what you are talking about.
Hugs,
Claudette
Post a Comment